PROFESSIONAL ARCHITECTURE PHOTOGRAPHY TIPS
Can’t find really working architecture photography tips for the first photoshoot? Do you want to know where to start? Are you going to take architecture photos for an important order or Instagram but not sure what equipment you need and what kind of light to set? Keep on reading.
1. Choose Locations
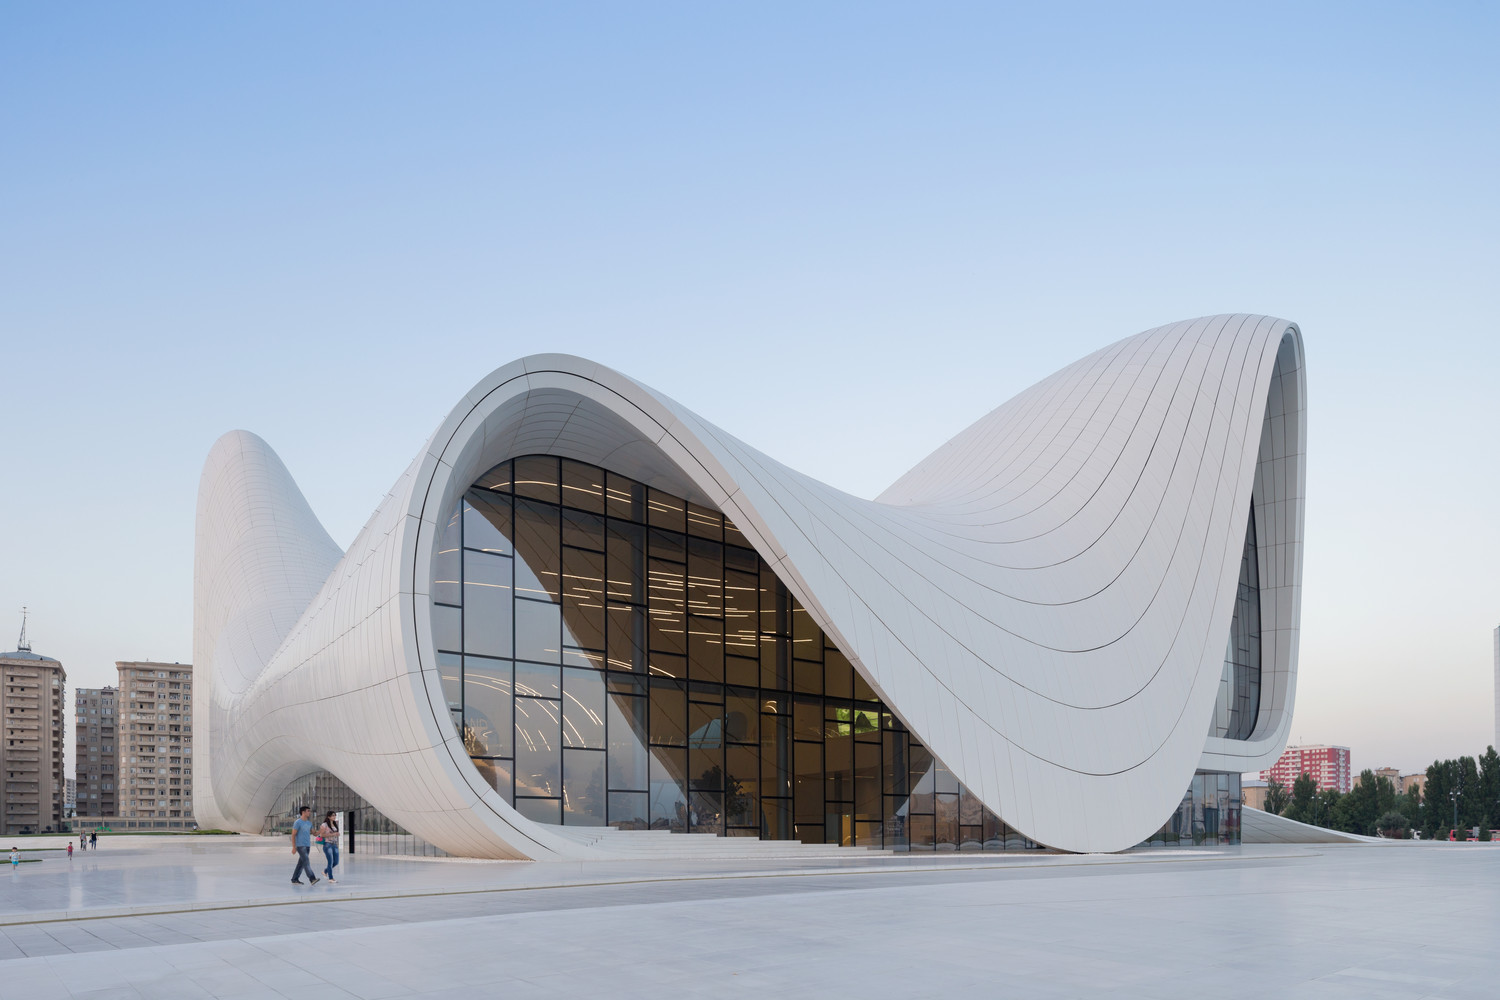 Heydar Aliyev Center by Zaha Hadid Architects. image © Iwan Baan
We recommend using mobile applications to search for beautiful locations. Among them, you can find Spot, Google Maps and Scene Scout. Also, it’s not difficult to find suitable subjects for real estate photography in any city. You can shoot buildings or structures that attract your attention or mean something to you.
Architecture photographers frequently take photos of government buildings, museums and historic landmarks. Such buildings usually look interesting and beautiful.
2. Pay Attention to Composition
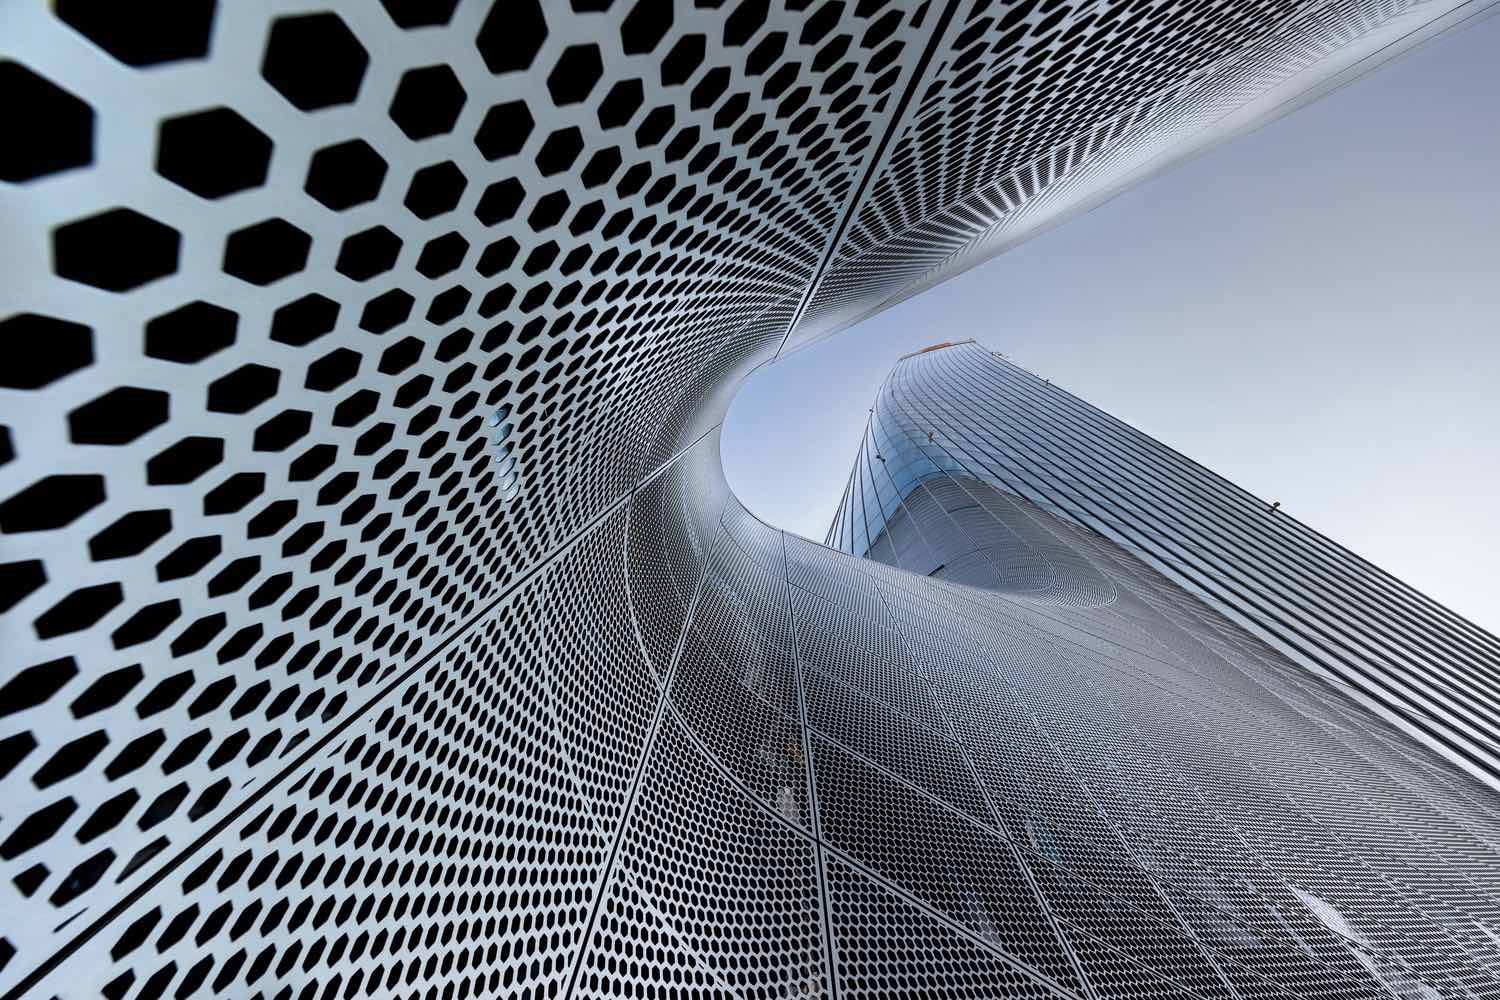
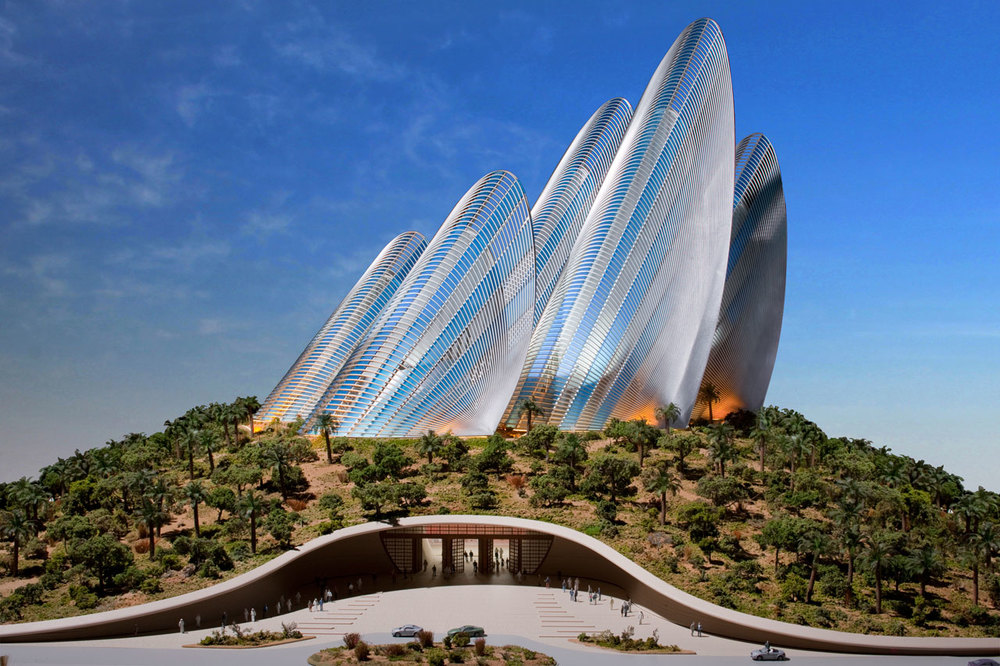 Zayed National Museum by Foster + Partners
Many beginner real estate photography classes will teach you that the building is the center of the frame and the rest of the elements should complement it. In this way, you will achieve a harmonious picture. However, it’s not necessary to place it in the center, it’s enough to just focus on it.
You can fill the photo with details, shoot a building along with other houses, take it out of the usual picture as if isolating it. In addition to the buildings, you can shoot elements, combinations of details, sections of a wall or houses, stairs, balconies and doorways.
3. Shoot in Different Weather Conditions
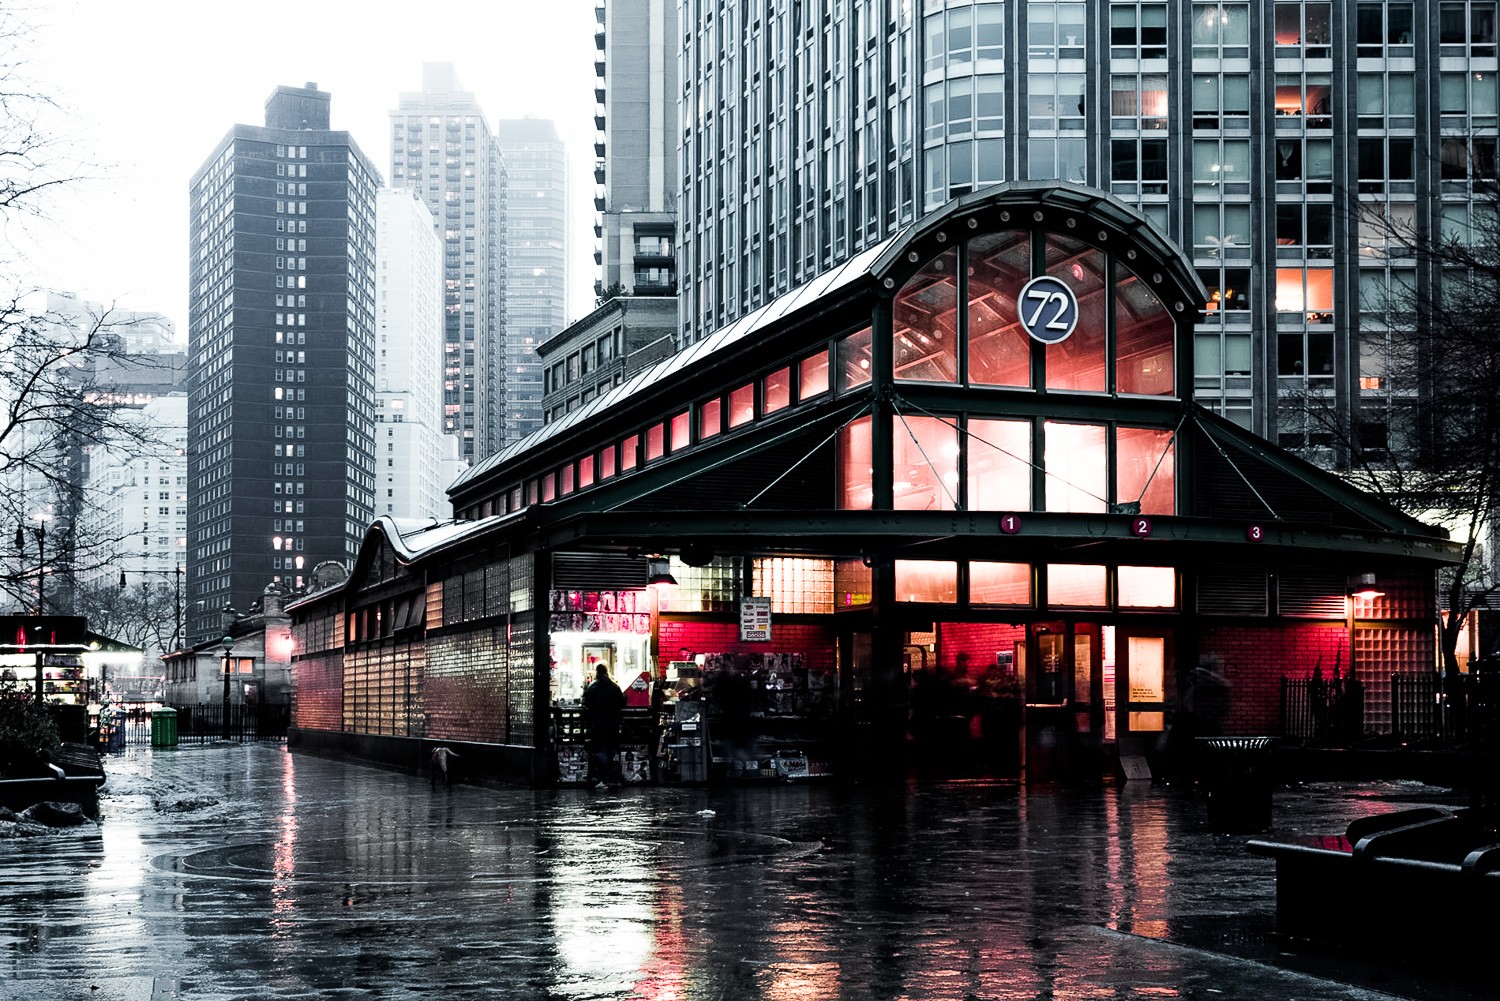 NYC, New York. image © Serge Ramelli
You can use applications that will help you know the weather in advance. For example, WeatherBug, Weather Underground and 1Weather. By the way, it might be surprising for you that the best photos are taken during the storms and when the sky is cloudy. The dark sky, rainfall and possible rainbow can create an amazing atmosphere and improve image quality. Another tip for a good architecture photo is to come back to the same location a few times during different weather to take more photos of the building and find the best photo from all.
Professional architecture photography is an essential aspect of showcasing real estate, capturing the intricate details and aesthetic appeal of structures. In Charlotte, NC, where the real estate market thrives, affordable real estate photography becomes a crucial anchor for property marketing. These skilled photographers employ their expertise to highlight the unique features and design elements of buildings, helping potential buyers envision the spaces they could call home. Through carefully composed shots, they not only showcase the architectural brilliance but also emphasize the character and charm of each property. Affordable real estate photography in Charlotte, NC, serves as a valuable tool for real estate professionals, enabling them to present listings in the best light and attract a broader audience of prospective buyers.
4. Use a New Perspective
.jpg) Qatar National Convention Center. image © Hisao Suzuki
Qatar National Convention Center. image © Hisao Suzuki
When you experiment with different perspectives, follow the basic rules of photo composition to achieve impressive images. For instance, use an archway to frame a shot. Also, you can use architecture to visualize leading lines, symmetry and repetition of shapes. Remember about the rule of thirds as well. When determining the visual centers, the frame is usually divided by lines parallel to its sides, in proportions of 3: 5, 2: 3, or 1: 2. The latter option gives the division of the frame into three equal parts (thirds) along each side. The grid constructed by the rule of thirds is used in the viewfinders of some cameras to simplify the composition of the frame.
5. Shoot Architecture in the Evening
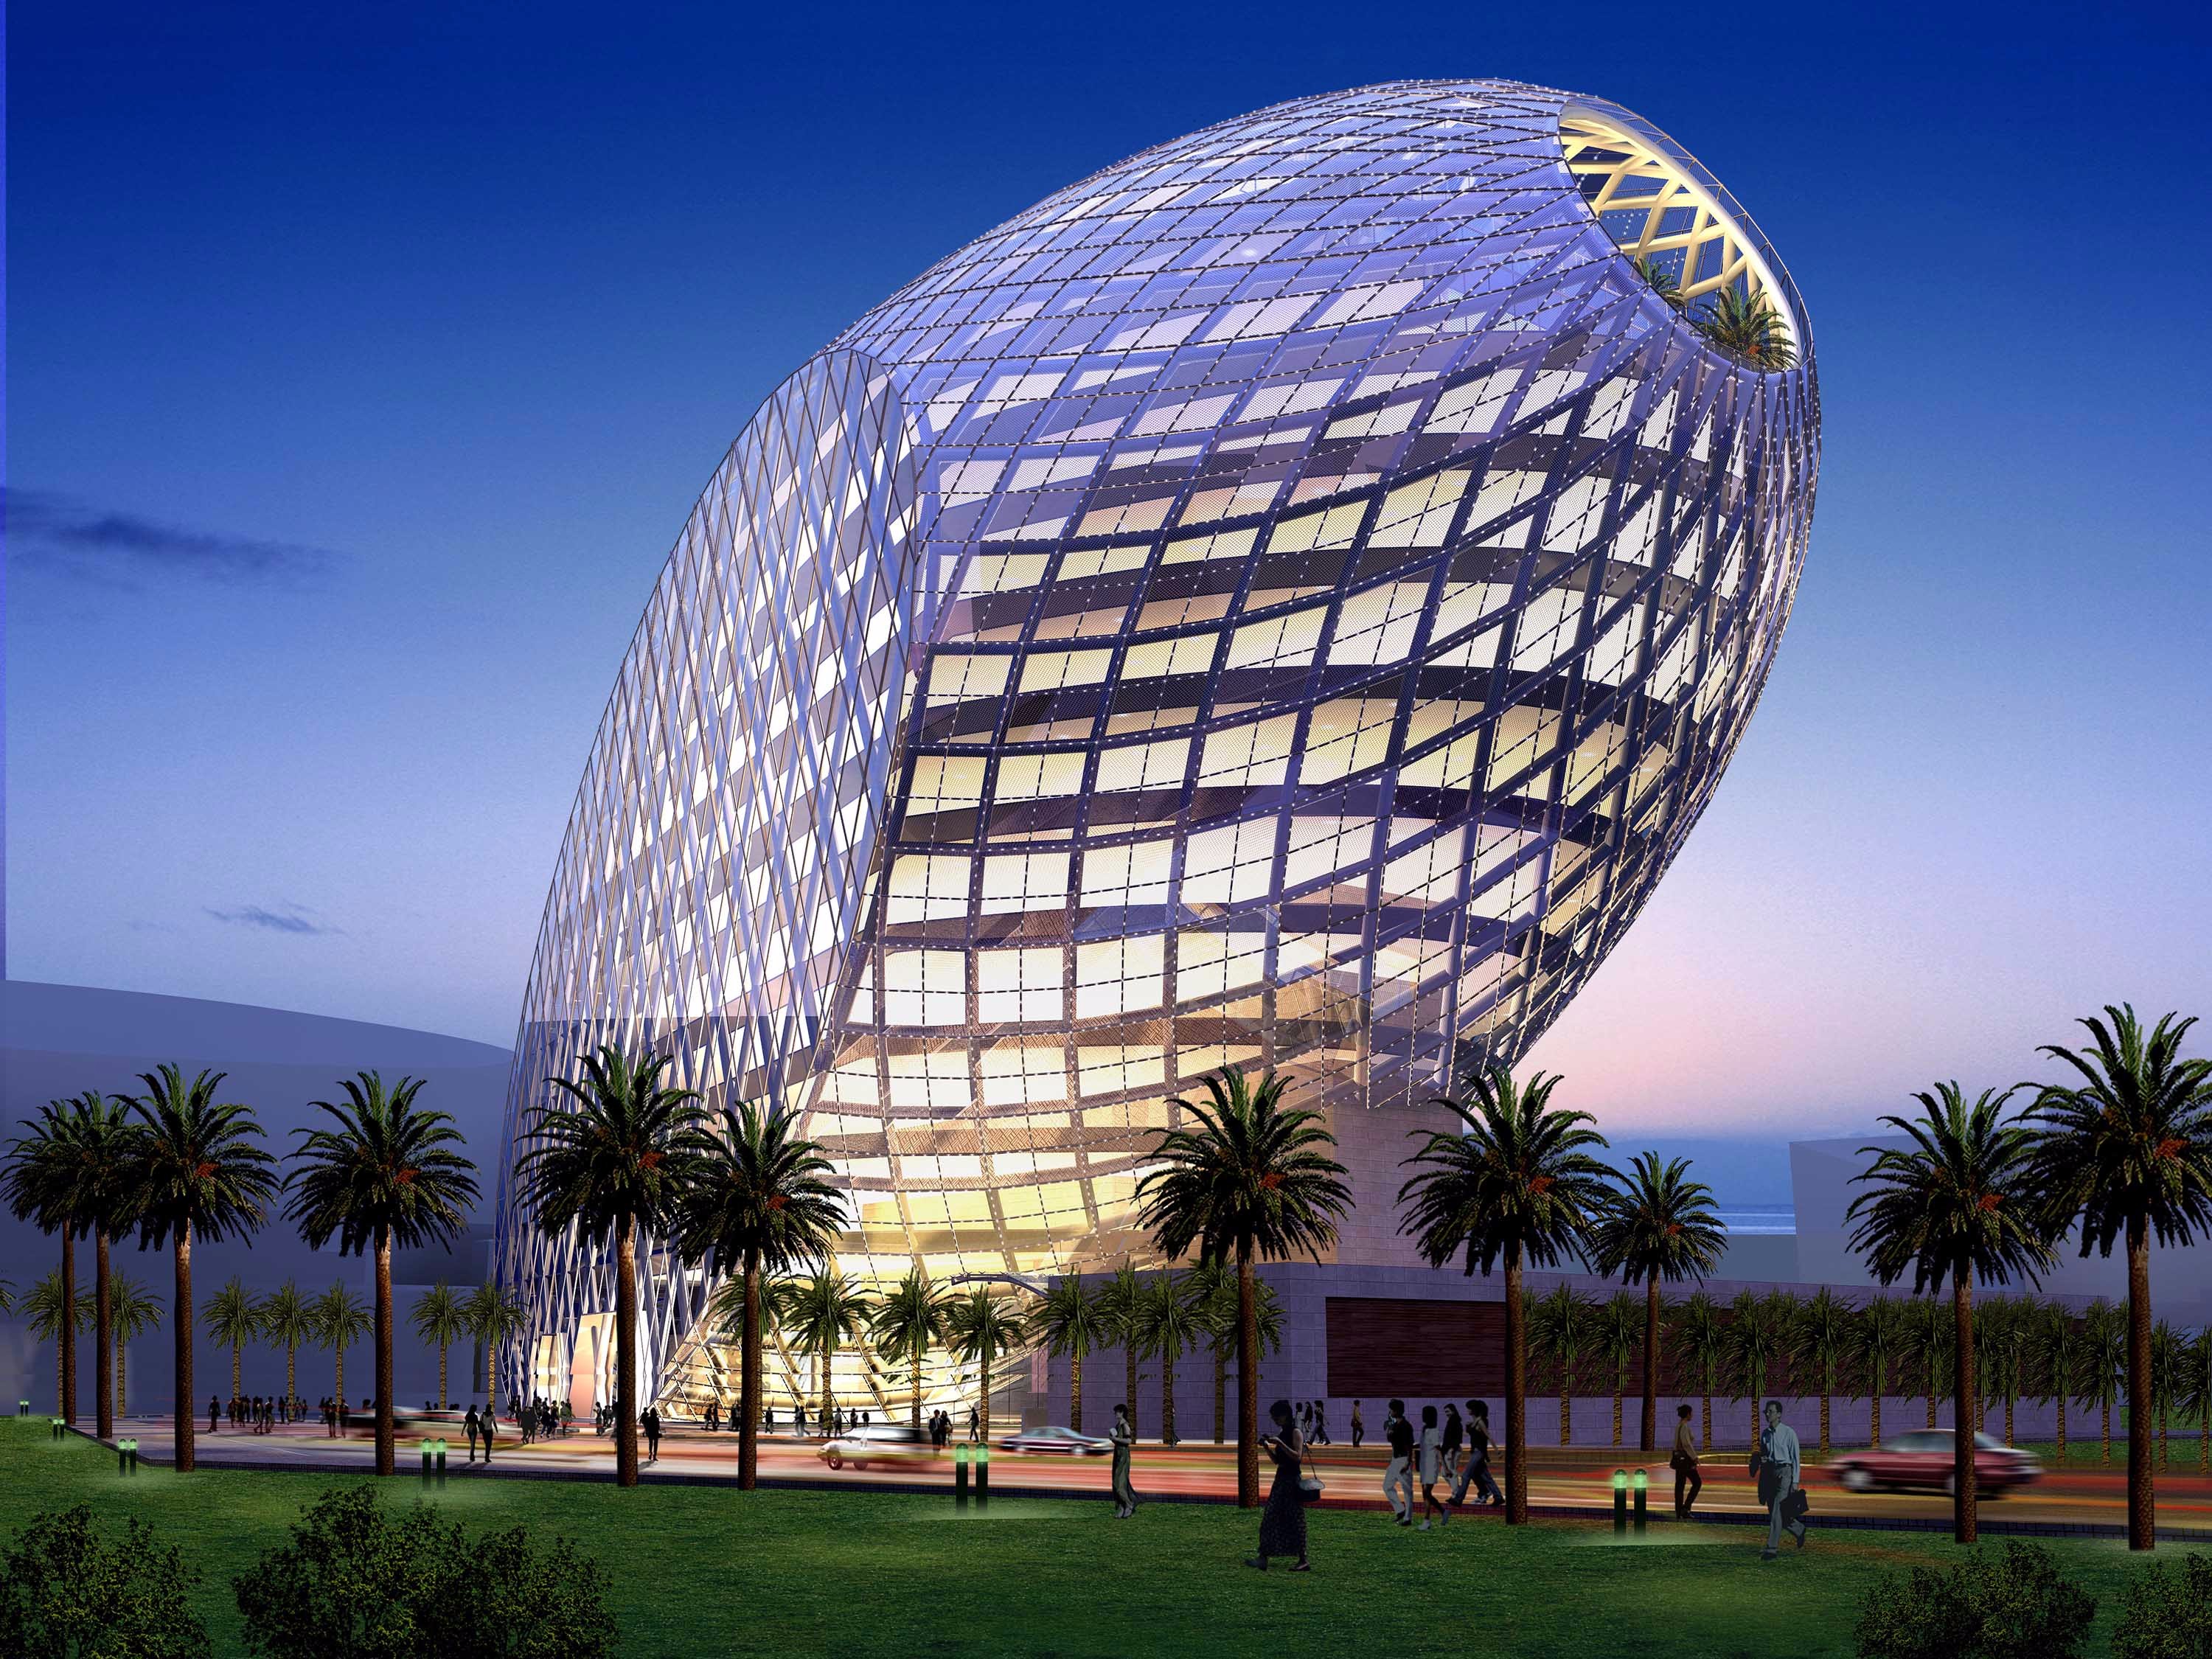 Cybertecture Egg, Mumbai by James law cybertecture
The evening time starts from 6 p.m. or 7 p.m. That’s when you can spot an additional range of colors which gracefully illuminates separate elements of buildings. Wait until there are the evening lights in the windows of the houses and the headlights of the cars light up. You have to find a safe place for yourself with an interesting perspective. Mount the camera on a tripod or something reliable and choose a shutter speed of a few seconds. It is better to use a self-timer to ensure the good sharpness of your architecture photo. You can increase the exposure time to add dynamics to the picture. In this way, you will be able to create the feeling of people moving inside the building or on the street, or graceful floating of the clouds.
6. Set Up Your Camera
The aperture value is more important here. Our advice is to work in aperture priority mode (Av or A) and select an aperture value between F8 and F16. Larger or smaller values don’t produce optimal sharpness. The keyword is diffraction. As for shutter speed, it depends on the time of day: thousandths of a second during the day or a few seconds at night for gorgeous long-exposure photos. If you want to achieve the best result and get the sharpest background even at a large distance, you should learn more about hyperfocal distance. It’s the focusing distance that you set on the lens to create a seemingly infinite depth of sharply depicted space.
7. Use a Wide Angle Lens
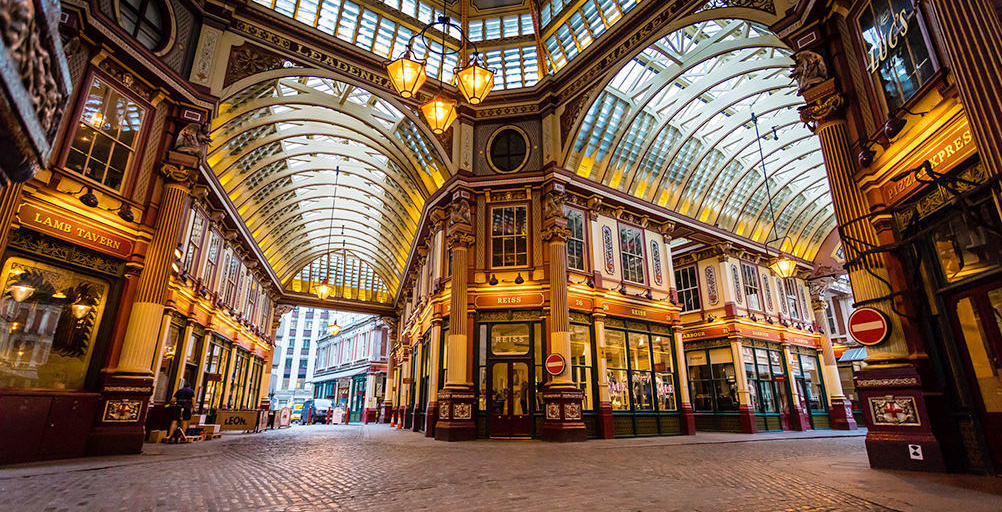 Leadenhall Market, London. image © Simon Rae
We recommend choosing a 15-35mm lens. A 16-35mm lens would be perfect for architectural photography. It will provide a good range of super wide at 16mm and still let you zoom out to 35mm. Be careful with distortion though. A 16mm lens causes a lot of distortion, especially if photos are taken close to a building. Keep the fisheye lenses in mind as well. Such lenses are very wide, so they capture more and cause a lot of distortion.
8. Keep a Tripod Handy
A tripod is a three-legged device that holds your DSLR/mirrorless/point-and-shoot camera steadily and eliminates shaking. With a tripod, you will avoid blurred photos and will be able to shoot clear photos using slow shutter speeds (long exposure), which are beneficial for night photos or architecture photography. Today, the best tripods are designed by Manfrotto, Neewer and Vanguard. They are quite high – 63 inches and made of durable material – aluminum.
9. Use a Polarizing Filter for Exteriors
A polarizing filter is an affordable accessory that will help you create better photos. Polarizers manage reflected light. It means that they easily control reflections off windows or water in architecture. Even if you don’t have obvious reflective light effects, polarizers will make the sky seem bluer. AmazonBasics Circular Polarizer is a great option. It makes the blue sky more intense and reduces or removes glare. Due to its multi-coating, it reduces reflection too.
10. Take HDR Architecture Photos
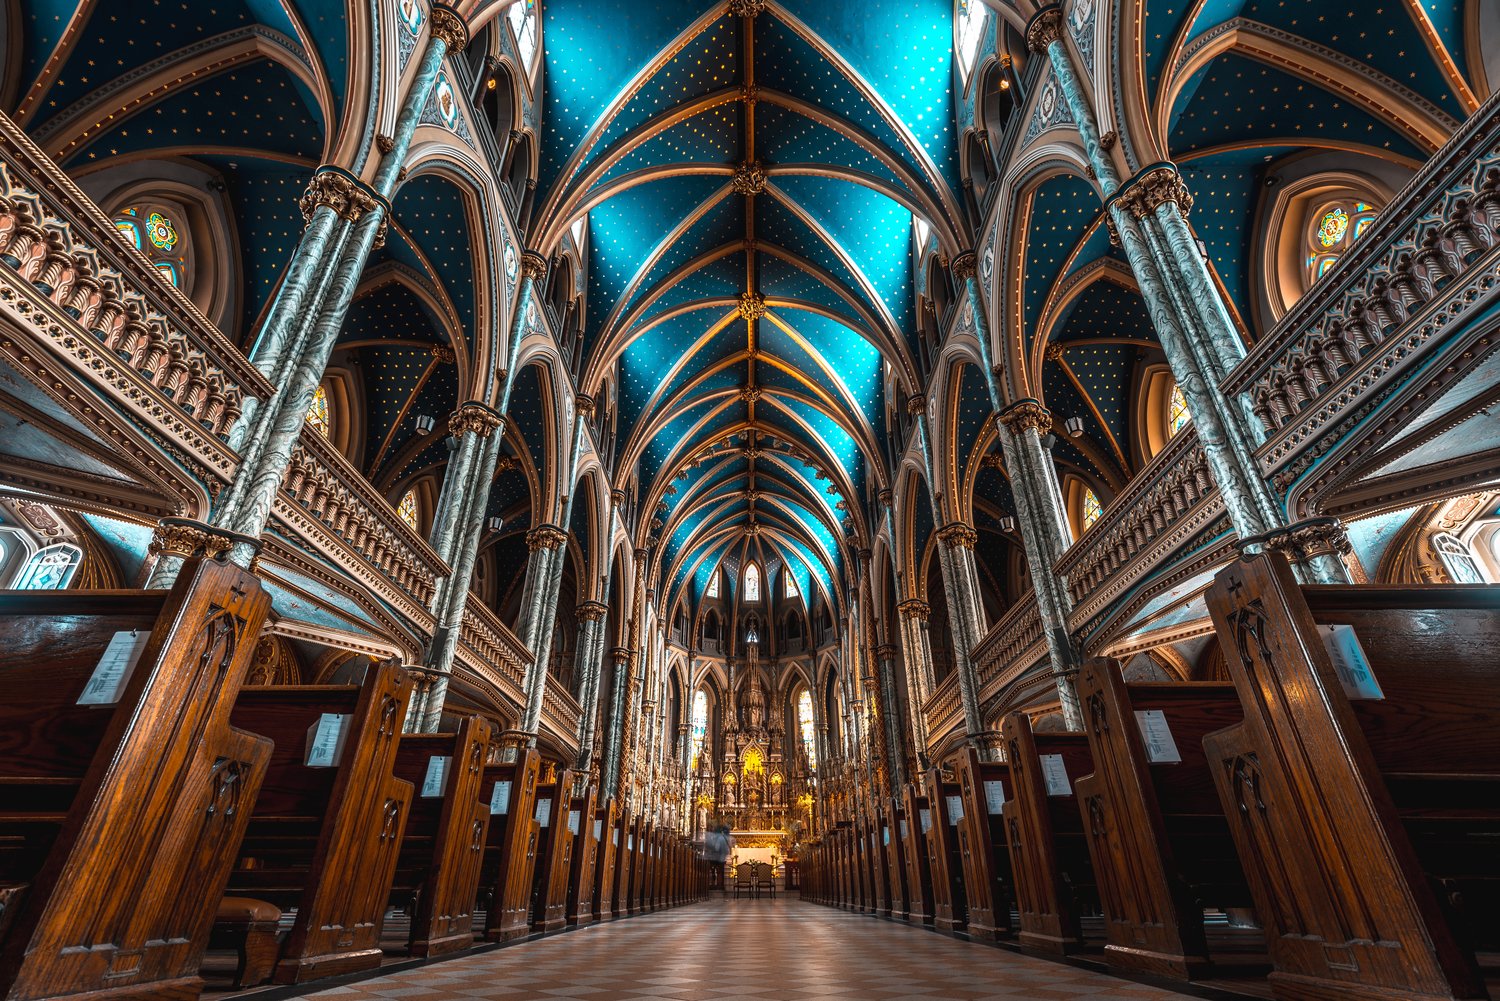 Notre-Dame Cathedral Basilica, Ottawa, Canada. Image © Marc-Olivier Jodoin
HDR can be used too often but it’s a good idea for architectural photography. You can achieve this effect with just a camera, presets or special applications like EasyHDR and AuroraHDR. Besides, it can solve the problem of potential over- and under-exposure when you can’t use your lighting set up. For instance, if you need to show some detail outside a window and the interior of the room, HDR will help you achieve it. From the artistic point of view, it’s also nice for creative exterior shots, as in the photo above.
11. Take Multiple Photos of the Same Place
If you come to the same place from time to time, you will be able to show new layers in the architecture, which you can use to transfer the information about the development or the degeneration of a building with time. Shooting a new building is great and interesting but checking that building after one photo from time to time is also a nice idea. Truly interesting aspects of the building may be seen only with time.
12. Pay Attention to Reflections
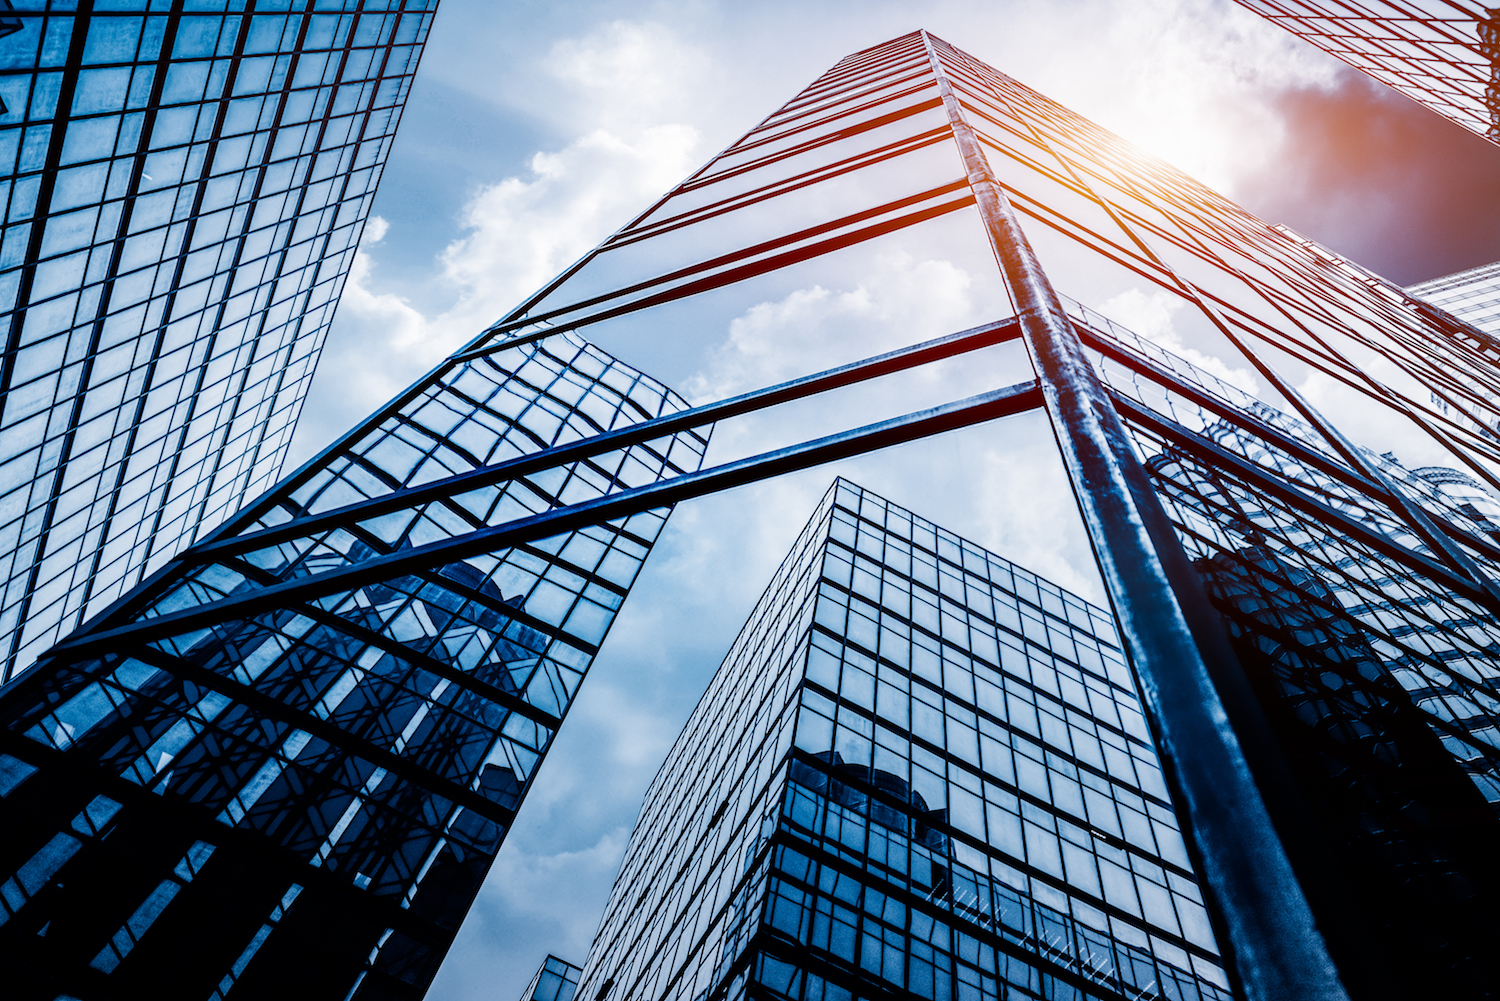 low angle view of skyscrapers in Shenzhen,China. Image © fanjianhua
Sometimes there are buildings, especially in modern areas of the city, which are fully made of glass, from top to bottom. They can be used as fantastic reflective surfaces that offer a range of compositional techniques, such as symmetry and patterns. Also, besides them, you can use the reflective properties of puddles and different reservoirs, sunglasses and vehicle windows, where these buildings are reflected.
13. Look for Lines and Shapes
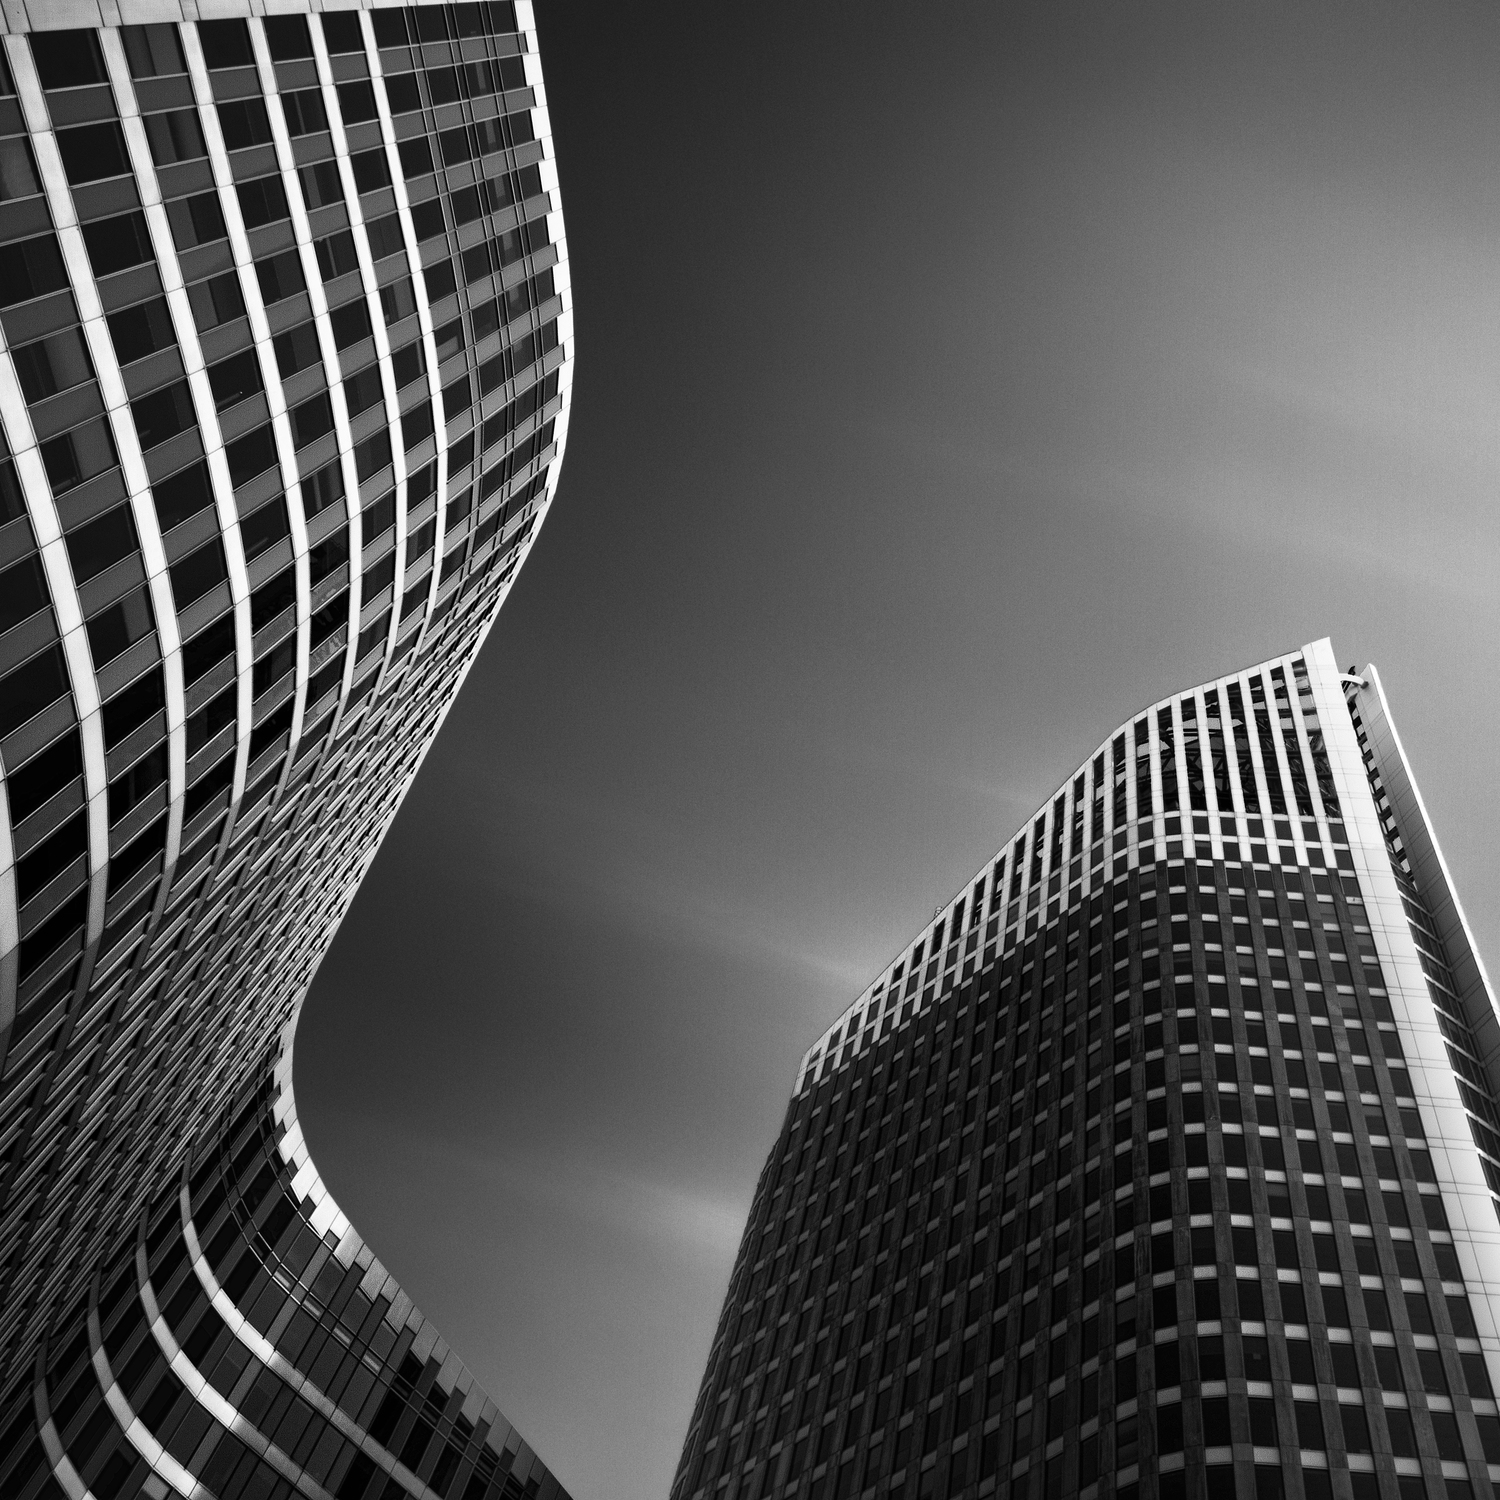 Image © Joel Tjintjelaar
Lines and shapes are important for architectural photos and very helpful for photographers. Look for horizontal, diagonal, or vertical lines to move your eyes through the photo. Leading lines can show the structure and draw attention to the subject. Lines also create emotional associations. For instance, diagonal gives a feeling of movement, horizontal - calmness, vertical - power or growth. You won’t see many curved lines in architecture, but they create a natural feeling as they are usually found in nature, instead of built structures.
14. Include Some People
Even though architecture photography is generally about buildings, it’s a nice idea to capture some people in your photos too. Anyway, architecture exists thanks to people. If you capture people, your architecture photos can show the relationship between people and architecture, and tell how people use it.
15. Perform Photo Post-Processing
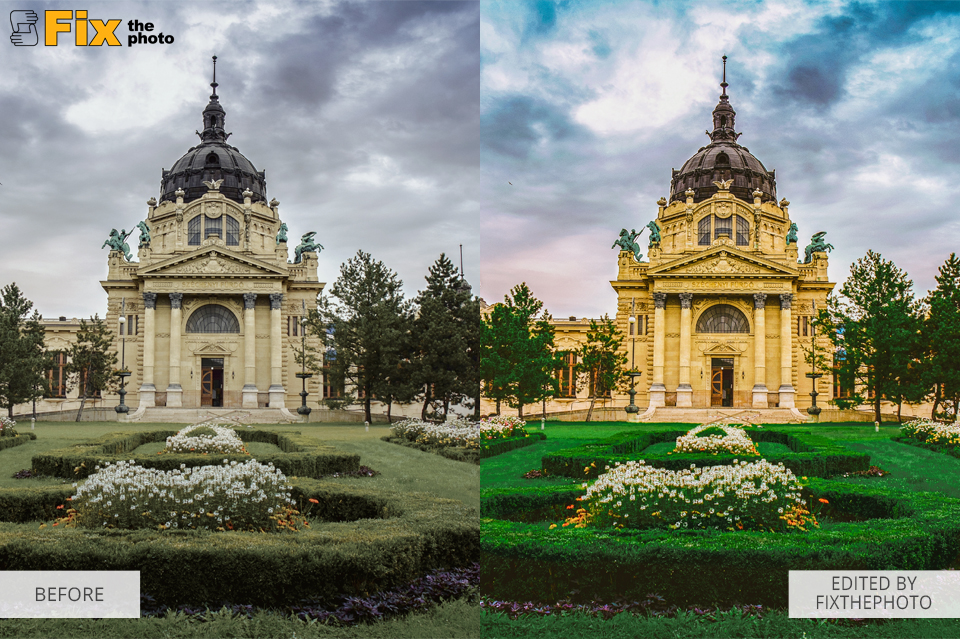 Image © Fix the photo
If you perform post-processing of architecture photos on your smartphone, we recommend using such applications as Photoshop Express, Snapseed and VSCO. If you edit photos on your laptop or PC, use such programs as Lightroom (excellent for batch processing) or GIMP (a free analog of Photoshop). Also, you can use Photoshop for architectural renderings.
Besides, you may try online photo editing programs like Fotor, BeFunky and Polarr. They are free and all you need to edit your photos is an Internet connection.
However, if you don’t have time to edit photos by yourself, you can approach outsourcing services. Architecture photo editing includes color correction, white balance alignment, setting the correct temperature, adding sharpness and even applying effects. The price of color correction for such services usually costs from $0.20 per photo.
16. Use Adobe Lightroom Presets

Many professionals are using Adobe Lightroom to edit their images. Lightroom offers an array of post production options including importing, handling and arranging your pictures. Lightroom is a combination of photo management and photo editing in a single tool.
But, if you do not enjoy the editing process and rather spend more time taking photos, then using lightroom real estate presets is the easiest route to edit your photos in one click. They are cost efficient when bought in bundle packages and can be easily installed into the Lightroom application. Presets help photographers to customize their photographs to their specific needs quickly. Presets can also be adjusted and applied to multiple images at the same time in batch processing, saving you time.